|
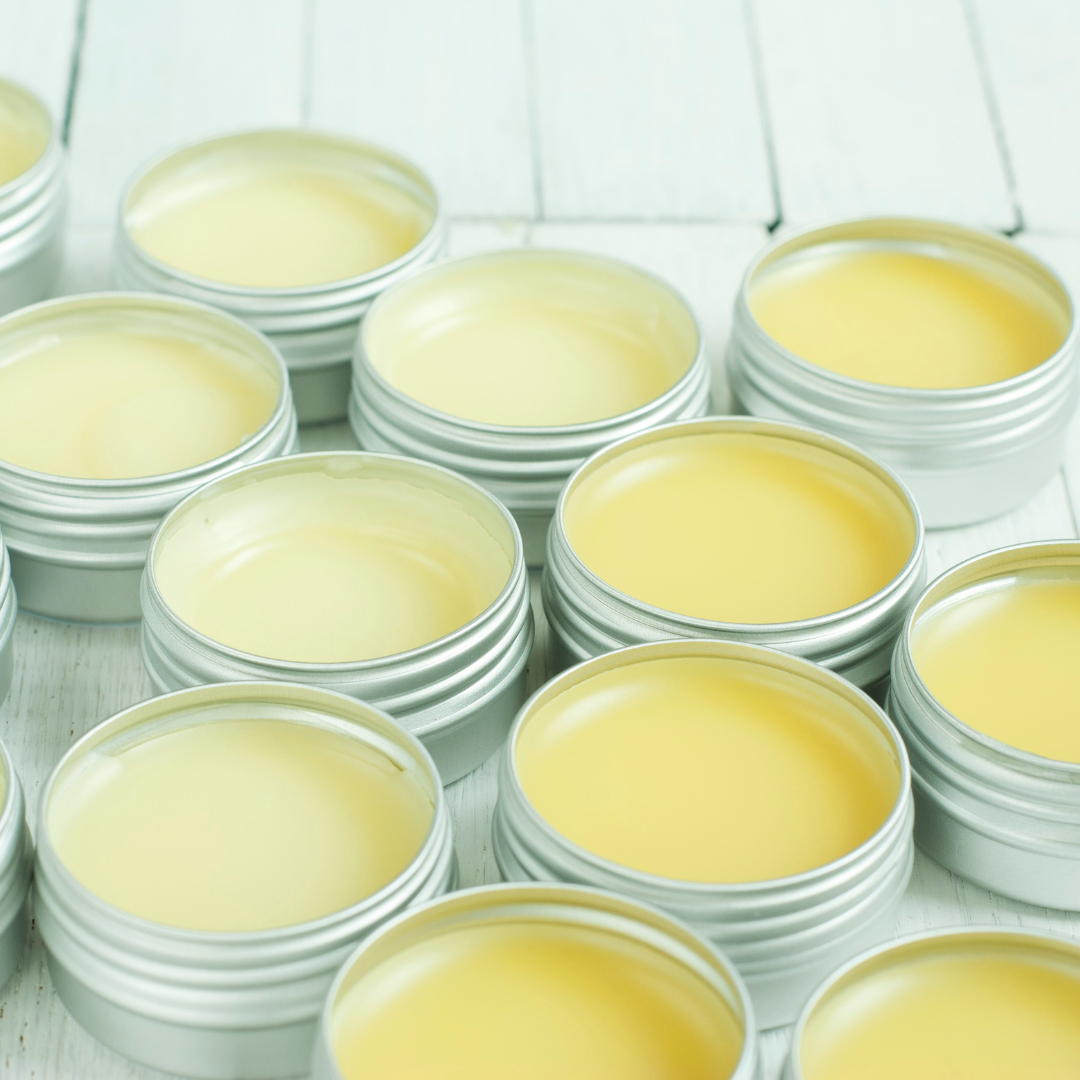
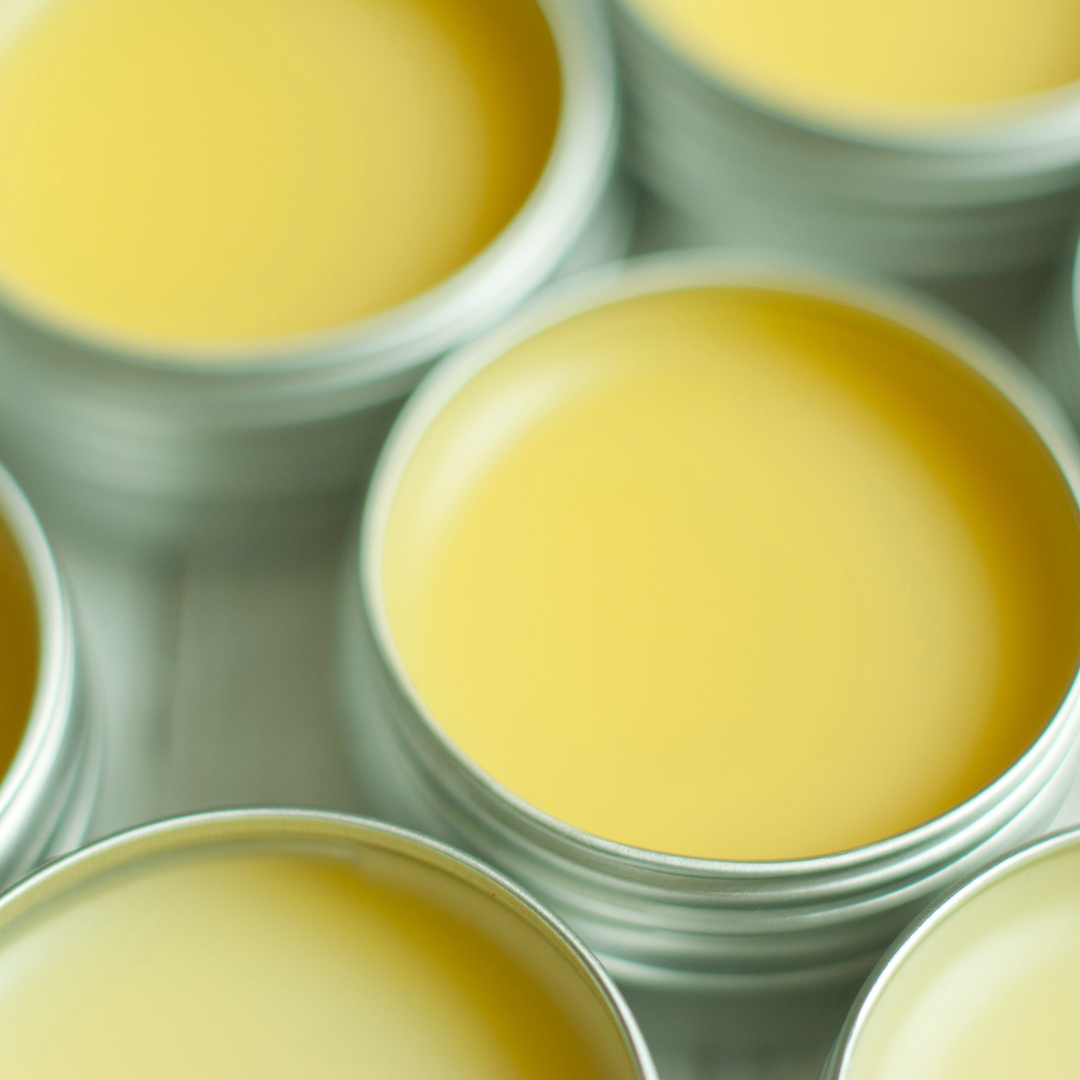
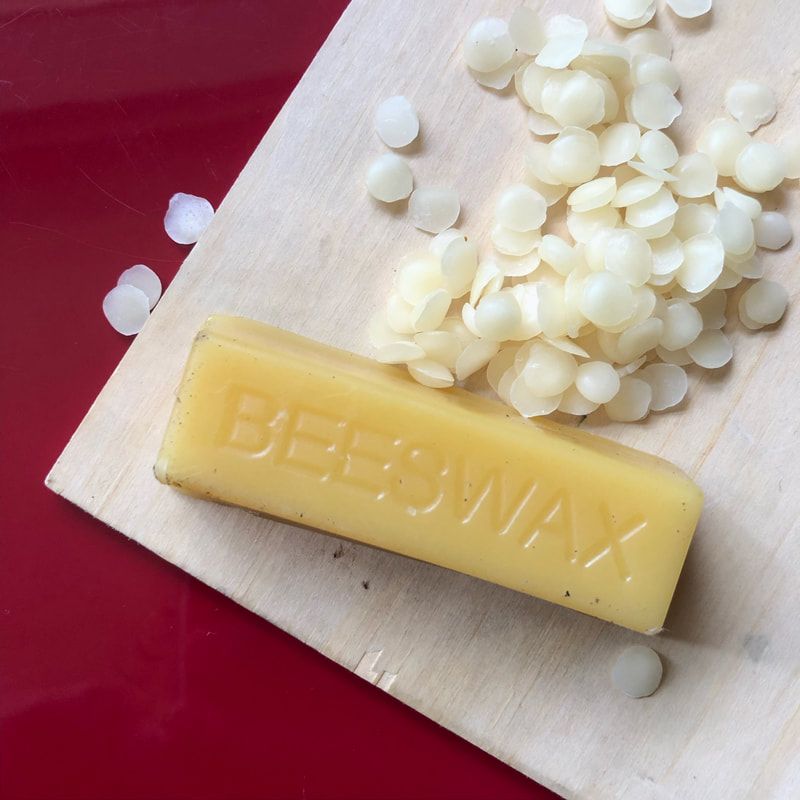
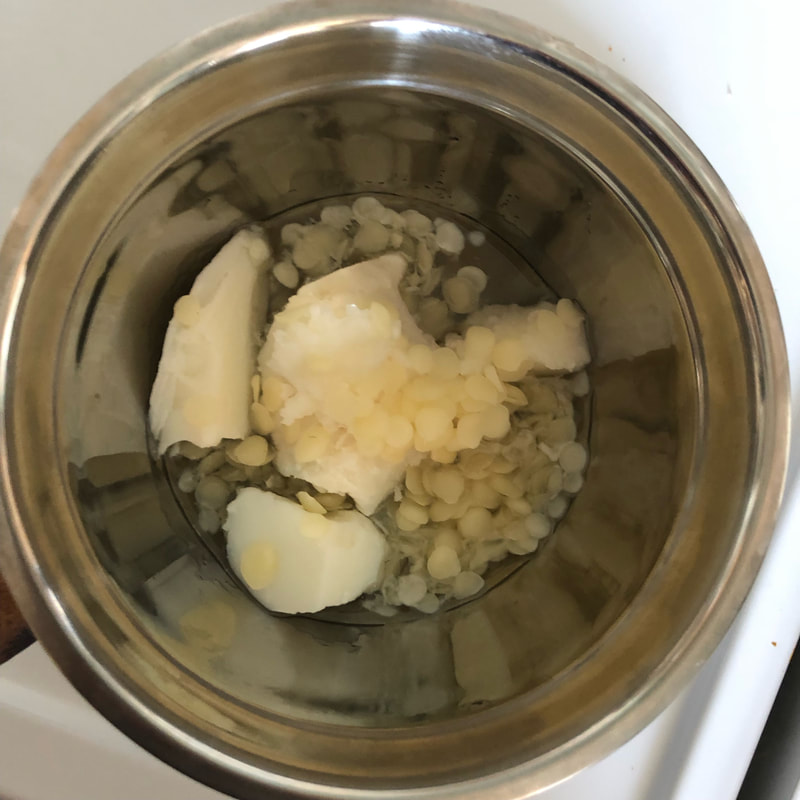
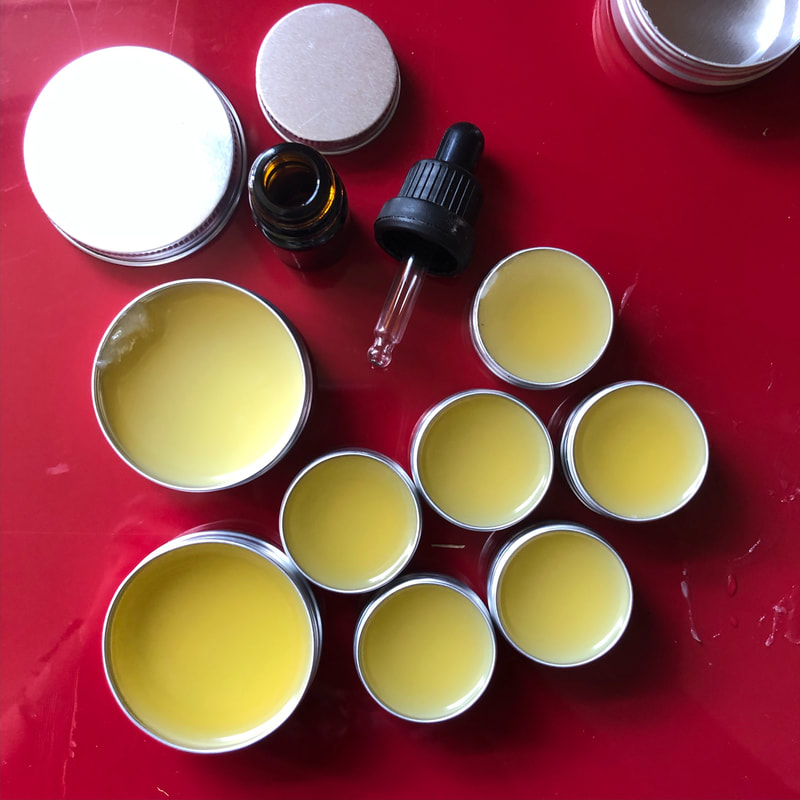
It's been a hot summer and I for one am very sad to say goodbye to the sunshine- but Autumn isn't all bad either- at least I can get all the knits out again. As the weather starts to chill down- it can be a bit of a shock to our skin which has been loving all the extra vitamin d from sunshine, the humidity which can actually help keep skin moisturised as well less need for lotions and gels we may be using in the warmer weather. The crisp air and winds can dry skin out and for me this is felt most noticeably on my lips. So heres a handy lip balm DIY tutorial to keep these pouts puckered and hydrated in the cooler days ahead. Equipment Double boiler or use a makeshift one with a metal/ heat safe glass bowl inside a saucepan Tin or container for storing final product in- I use tins but sterilised jars/ recycled plastic pots and sticks work. Optional- to make life easier you may want to use a jug or something with a spout to make pouring the liquid balm into containers easier. Spoon or mini whisk Optional use of kitchen scales- you can use ratios/ kitchen measurements or you can convert into metric Ingredients 2 tablespoon of beeswax or soy wax pellets or grated * 2 tablespoons of Mango Butter 1 tablespoon of Coconut Oil 1 teaspoon of Shea 2 tablespoons of Jojoba Optional- 1/2 teaspoon of vitamin e Optional few drops of chosen essential oil (these are half teaspoon measurements (around 2g) *beeswax is more natural and if you can get some from a local beekeeper then you may be helping your local bee population by supporting small scale keepers who take very good care of bees. However you may want to make your balm vegan and so soy wax is a great alternative- although soy wax often contains chemicals/ additives so may not be as natural. How to make In your double boiler/ makeshift version heat the wax (grated or pellets) and hard oils/ butters until completely melted and mixed together When all in liquid form add the jojoba ( you can substitute for another carrier oil such as sweet almond) remove from heat Add essential oil if you are using* and vitamin e Pour into your chosen containers Allow to cool (at least 30mins) so the balm sets into a more solid form. Label for your own personal needs * make sure you don't add more than 2g so the balm is safe to use and check the essential oil you are using is safe for lips and in a leave on product. Some to avoid for lips are grapefruit, bergamot, lemon, lime, eucalyptus, clove- either because they are photosensitive or can cause burning as they are to hot for sensitive lips. Your lipbalm will last a minimum of 6 months if stored airtight at room temp- longer in the fridge. Great idea for a thoughtful gift-
Would love to hear from anyone who has a go at this DIY- so please leave comments if you've had a go or been gifted a lovely handmade balm Love, peace and kisses Meg xxx
0 Comments
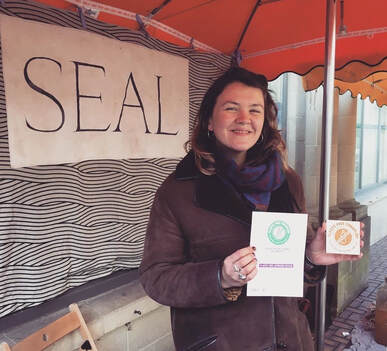
Earlier this year I was interviewed by Geraldine who runs Bristol Market online directory (which of course seal is listed on) and also the great Tobacco Factory Market in Bedminister. You can read the interview on the Bristol Markets website under news as part of the meet the maker series but heres another copy here. A little more info about yours seally. Enjoy x Tell us a little about your business – what is it you make?
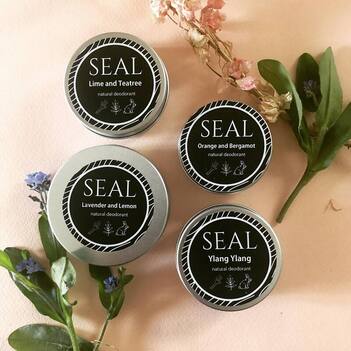
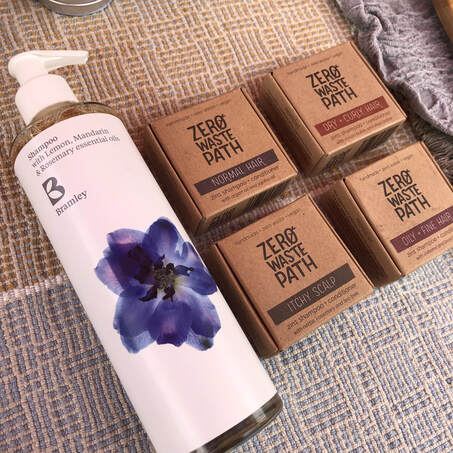
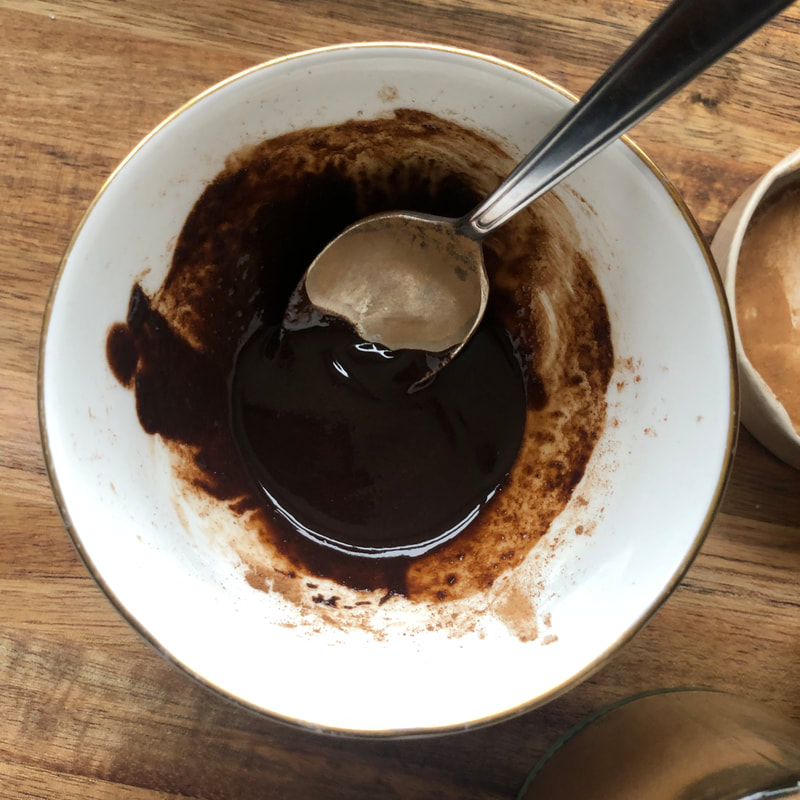
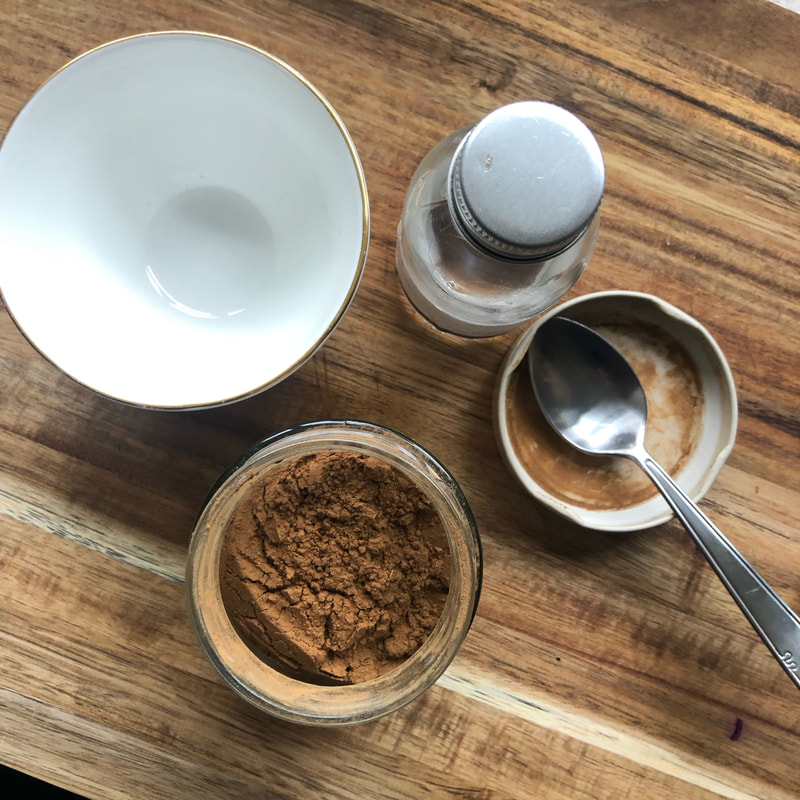
I am primarily a soap maker using traditional cold process methods. All seal products are palm free, cruelty free and vegan. The whole business is based around a plastic free, minimal waste ethos. I offer refills and unpackaged versions wherever possible, and give discounts for returning tins, and bottles. As well as the soaps I have a range of natural deodorants and lip balms, with new products in development. I trade at markets all over the south west, most frequently (every other week) at Stroud farmers market, where you will find me with the whole seal range and also a refill bar stocked with Bramley products. How did you get started in your creative field? I started SEAL in 2018 after a period living and working overseas- I had previously studied Fine Art and gone onto work in Community Arts and Education. When I returned to the UK I wanted to find a new direction and had always dreamed of being my own boss. When traveling through Asia I was shocked and appalled by the devastating pollution of the beaches, rivers and countryside, which I expected to be areas of exceptional natural beauty, but were in fact more like landfill sites. While I had some amazing times in my traveling days, seeing first hand the impact of global tourism really forced me to consider my part in the problem, and what I could do to help. It was at this time I began to think about ways that I could tackle plastic pollution. Seal started as a platform for zero waste brands and it has since grown to include a range of my own handmade beauty products. Talk us through your creative process… When I’m working on a new product it often starts with conversations with customers and friends. I will then do some research online looking at similar products, and refer to a few books that I trust. Once I've gathered my clues and drafted up a recipe, I just have a go at making it in a small quantity. This always involves a fair bit of trial and error but when I begin to feel I’m getting close to a result, I give samples to friends and get some feedback (all my products are tested on willing human adults.). I make amendments accordingly and after further human trials if I am happy with the results, I will send the product-to-be off for professional cosmetic approval. What sort of space do you work in? When I started the business I was living with friends working from the kitchen, which was not without its challenges! The soaps have to cure for a minimum of six weeks before they can be sold, so in the months leading up to Christmas (my busiest period), my stock has tended to take over. Last year however, I got my very own flat near Stroud which has made the making process so much easier. I have dedicated cupboards for utensils and ingredients, a curing/storage room and a view of the countryside, which is always a bonus. What are the values behind your business? Sustainability with a strong emphasis on zero waste/ minimal waste and also in respect to using plant based ingredients from trusted suppliers. Handmade with care. All my own products are created in small batches taking extra care to ensure quality and minimal wastage. Simplicity. Natural ingredients using traditional methods with no unnecessary nasties. Where do you find creative inspiration? Please feel free to include people/artists you are inspired by. I grew up in a creative household. My parents were artists, and ran a small business making props and costumes for fairs and festivals. The events were great fun. Playing outside, making plant potions and getting into fancy dress, these experiences also taught me about the highs and lows of running a small creative business. My mum is an amazing seamstress and an avid gardener, she always has some wacky project on the go, her creativity has always been inspiring. Zero Waste Path is a great small business that combines a strong plastic free/ zero waste attitude with great products. They have always been really transparent about the issues they’ve had to tackle in upholding their values, this gives me confidence when I'm faced with challenges in my own business. And lastly I love looking at Stanley Donwoods prints, my wavey packaging design is in part inspired by his work. Are there themes that run through your work? Well, I am a big fan of alliteration! If you are familiar with my products you may have noticed - Seaweed and Sage, Turmeric and Tangerine, Lavender and Lemon, Pine and Pink Grapefruit ( aka Pink Pine) it’s not always possible but when I can, I do! Sometimes even, If I am wavering between scent combinations an alliteration could be the deciding factor. What do you love most about making? I love learning about different ingredients and their strengths and weaknesses and being able to test that out. It is great to be able to learn and understand about what is going onto your skin and into your body. It’s a really great way to be more in touch with the natural world when you appreciate the magic of plant oils, botanicals, clays, salts etc whilst also taking good care of your own body. I also find it quite empowering to be able to make such useful stuff as soap, beauty products and I also make my own cleaning products. It gives me a sense of self sufficiency and control over my environment. Which piece of work are you most proud of? I am most proud of my range of soaps. Over time I have developed a varied collection of scents, each with their own beneficial properties. With 8 scent combinations to choose from there is a bar to suit all tastes and skin types, I think this is why they are my best sellers. I will never regret the move towards creating my own range of products, it gives me a great sense of achievement knowing that i have done everything from sourcing the ingredients to designing the packaging of these lovelyl bars. My personal favorite is Seaweed and Sage as it feels very refreshing on my skin and has a lovely deep herbal scent. Describe your work in three words… Clean wavey smells If your someone like me that struggles with keeping hair long and lush and you may also like myself be struggling a bit more than usual in these colder months. Cold days, wind and frost as well as central heating and wooly hats can all lead to problems including dryness, breakage, flakiness and/ or grease. I'm one of those unlucky people with fairly fine wavy and a little bit straggley/ flyaway hair that does'nt like to be long much to my dismay. Throughout the winter I do see some degree of all these issues and now that I finally have hair with some length that I am determined to take care of and keep I thought I would share here what I have tried to keep my scalp, hair and head all happy and healthy in the winter and so here it is- a list of my top tips to keep those locks healthy and happy in the chillier weather. 1. Cover HAir in very cold weather/ wind or snowI am a big beanie hat lover and have always worn one constantly though winter to keep me cosy. In extreme weather such as high winds, snow, frost and rain then this would be the right thing to do as your head/ hair and scalp will all benefit from the extra protection from the elements. This cold weather causes extra stress on your hair that it can really do without in the already drying winter. You can use a silk/satin scarf to cover hair or line a hat if you want to avoid static or friction that wool and cotton materials can often cause. However I have recently learnt that actually constantly wearing a hat throughout winter can be detrimental to hair and scalp health- which leads me nicely to point no.2 2. Don't cover hair on sunny daysYour scalp will benefit hugely from getting some rays on it so on sunny days (even those that are still quite chilly) its better to leave the hat off and instead opt for ear muffs or I wear a huge scarf. The sun gives us vitamin d which plays a vital role in our overall health- keeping our immune system strong. A lot of scalp problems such as dandruff or scalp psoriasis are linked to autoimmune issues so getting as much vitamin d is likely to help prevent flair ups if you suffer with these issues. Vitamin D is also thought to help with the creation of new hair follicles leading to thicker hair so more reason to uncover that head. 3. wash hair less often and Use warm waterThe cold weather might make it tempting to turn the taps up for hot showers and baths but be warned that hot water can remove the natural oils and moisture from your hair which will make it dry. It may also lead to a dry scalp and cause flakiness. Try to always wash your hair with lukewarm water and blast with cold water at the ends to help seal the hair cuticles. This can also be said for your skin especially the delicate oils on your face that don't need to be completely stripped with hot water. And its also extra important to avoid leaving the house with wet hair. Hair that is wet is more vulnerable and prone to breakage. This is because the water droplets left in hair can enter the hair shaft and when the water temperature reaches freezing it can swell the shaft. This in turn means that the cuticles can move from where they should be, leaving hair exposed to the elements without its usual buffer. Wet hair plus wintry weather can also fade your hair colour faster and harden hair strands, leading to a higher likelihood of breakages and split ends. It is also very important not to brush hair or comb hair when its wet as this will most likely cause more breakage as hair is extra fragile when wet. Really you want to minimise hair washing as much as possible to allow your hairs natural oils to work their magic- and always try to avoid using any harsh products containing SLS or phelates- you can shop our amazing range of shampoos and conditioners that all fit the bill under haircare 4. Moisturise hair (tips and Scalp)Though you might not see much of your scalp, it needs just as much care as your hair. In winter the drying duo of central heating and frosty weather can strip away moisture, creating a dry, flaky scalp. And, as you turn the taps to hot in your shower in the colder months this extra heat can over-wash hair and strip it of its natural oils too. As these oils are what ordinarily keep your hair protected and looking healthy, taking care of them is even more crucial for your winter barnet. Using a hair oil once or twice a week will help with this 5. do a hair mask- aim for weeklyI remember years ago when I was in a big bleaching the barnet stage of life my hairdresser telling me to try to do a mask once a week to add the protein back into my hair. She recommended sticking with the coconut based masks I'd been using but also adding ingredients such as avocados, eggs and honey. Apple cider vinegar is another great conditioner for the hair that can help to balance scalp and hair.. I think it is fascinating that hair can absorb the proteins it needs topically and it also another great chance to take a minute and give your hair and scalp a good massage to boost circulation. There are loads of hair masks available but as always its best to keep it natural and simple. Use ingredients you know and play around with combinations that will suit your hair and its needs. This week I've tried this very simple 1/2 Coconut and 1/2 cinnamon mask to help stimulate growth and improve circulation- taken from good housekeeping. I used around 5 grams of each and it smelt so good I wanted to lick the bowl You can check out this one and 6 other simple DIY hair masks below https://www.goodhousekeeping.com/beauty/hair/g29627145/diy-hair-masks/ 6. Eat healthy and stay hydratedAnd of course it is as important as ever in the cold harsh weather to keep your fruits and veg up for your overall heath but also for your hairy health. A healthy diet will help keep hair strong and shiny and help prevent hair loss- you need to make sure you are getting a good balance of essential nutrients such as zinc, vitamins, proteins and fatty acids and zinc. Nuts, avocados, sweet potatoes, spinach, berries and eggs are all good foods for a happy head of hair.
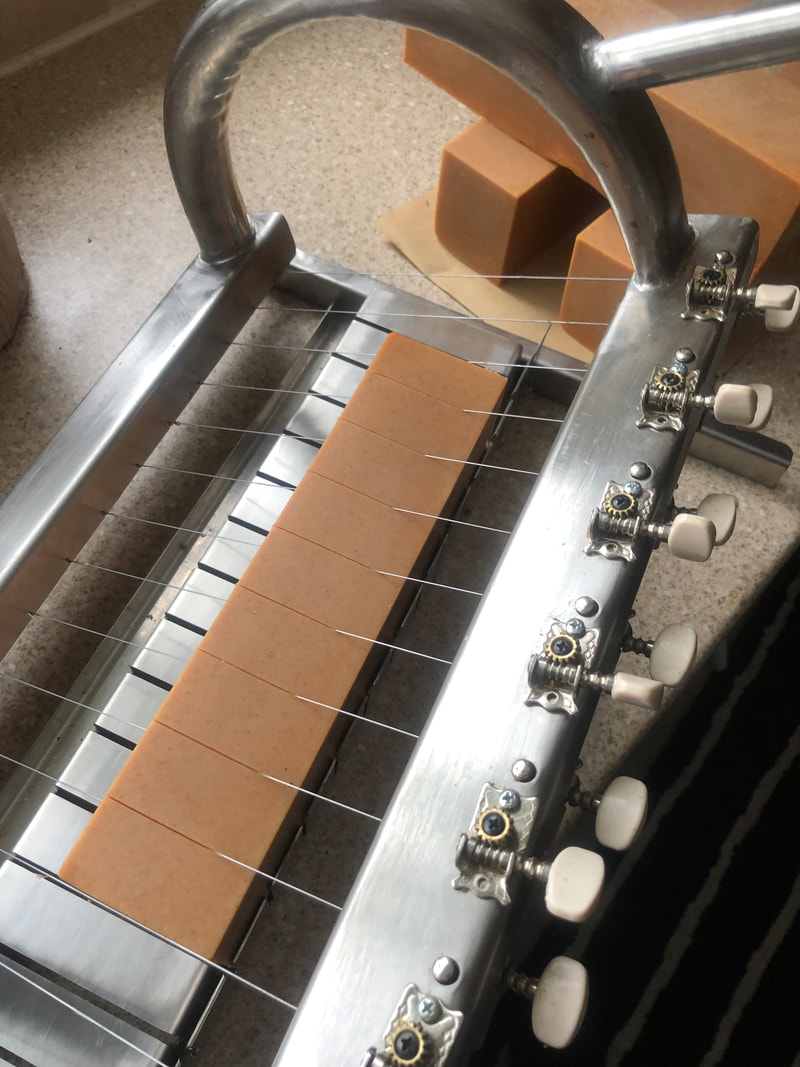
As we head into the season of festive markets and gift giving I thought I would focus this months seal blog piece on the wonders and benefits of handmade cold process soap. If you didn't already know, all seals soaps are handcrafted by myself meg in small batches, utilising the best natural plant oils (all vegan) botanical exfoliants, natural clays and scented with essential oils. Hopefully those familiar and those less so will find this interesting and give some insight into my choices of ingredients and processes whilst also aiding you with some soapey facts for when you choose to gift soap this Christmas. A brief history of cold process soapmaking Cold processed soap has an history going back to at least 2800bc when the ancient Babylonians mixed together fats and ash to make the very first soap. The process remains relatively unchanged although we use vegetable and seed-based oils, butters as well as animal fats (dont worry not at seal! We are plant based only) and the ash has been replaced with a substance called ‘lye’. Mesopotamians, Egyptians, as well as the ancient Greeks and Romans were amongst the first soap makers. All of them made soap by mixing fat, oils and salts. Soap wasn't made to use for bathing and personal hygiene but was rather produced for cleaning cooking utensils or for medicine purposes. This ancient process of soap making stayed relatively unchanged until the late 1700s when a french man discovered a cheaper means of production making soap much more accessible and 20 years after that another Frenchman discovered another link between cold process soap making and glycerine that lead to the start of commercial soap making at the turn of the 19th Century. Since then there have been no major changes in the process of soap making. However it could be said with the invention and development of dyes, fragrance oils, decorations and moulds the way soap looks and smells has been revolutionised. Youtube videos and blogs full of tutorials have helped people all over the world learn to make soap from their kitchens- this is how I taught myself infact. the science of makingThe process of making soap is called Saponification and all cold process soap goes through this process to come into being a soap. Saponification is a process that involves the conversion of fat, oil, or lipid, into soap and alcohol by the action of heat in the presence of aqueous alkali (e.g. NaOH ) NaOH is Sodium hydroxide, also known as lye or caustic soda. It is an inorganic compound with the formula NaOH. It is a white solid ionic compound consisting of sodium cations Na⁺ and hydroxide anions OH⁻. Sodium hydroxide is a highly caustic base and alkali that decomposes proteins at ordinary ambient temperatures and may cause severe chemical burns. It is highly soluble in water, and readily absorbs moisture and carbon dioxide from the air. It forms a series of hydrates NaOH·nH₂O. The monohydrate NaOH·H₂O crystallizes from water solutions between 12.3 and 61.8 °C. The commercially available "sodium hydroxide" is often this monohydrate- (Science from Wikipedia) To create the lye solution you add the white crystals to water (never the other way round) stir for a few minutes to prevent crystallisation- the temperature will increase dramatically and then leave till the solution reaches the desired temperatures. It is really important to work in a well ventilated space and with some PPE, like gloves and a mask as the lye solution is quite toxic and horrible to breathe in or get on your skin- remember fight club. Its not quite that bad but its not great either so be careful and take some precautions. Plant based oils should be heated to within 10C of the lye solution and then mixed and blended to a custard like batter. I personally like to add lye and oils at around 40cor lower and I would never do it higher than 60c. Mixing lye and oil at higher temperatures can cause soap volcanoes so its a great skill to be patient to wait for everything to cool. qualitys of plant based oilsTraditionally soap was often made from tallow (a rendered form of beef or mutton fat) or Lard (Pig Fat) and although this is pretty disgusting for alot of people and I would include myself here, there is something to be said for the sustainable qualities of these ingredients. Such as they are often a waste product from animals being slaughtered for meat and if you can eat an animal then surely all of it should be used. If people are happy to wear animal products such as leather and eat meat then using animal fats in cosmetic products is not so different. The other green credential of these fats being that they can generally be sourced locally so less air miles on your ingredients which is always a plus. This being said I tend not to wear leather and am a vegetarian so its not something I feel comfortable doing and for this reason I use only plant based oils. I also choose very early on in my soap making life to avoid using palm oil because of the devastation of natural habitats often attributed to palm production. ( maybe I will explore this a bit further in a follow up post). All oils have their own special properties and learning these is one of the joys of this craft. Both Palm and Animal fats tend to lend a hardness to bars which is why they have been favoured. To compensate for using softer oils you can work with water reductions in your recipes and increased curing time. I do both of these with all seal soap bars curing for an average of two months. So some of my favourite soap oils are Coconut oil- Loved by skins everywhere- CO has loads of great properties- it is both antibacterial, antifungal and antiviral, moisturising and aids skin healing. It creates a rich and bubbly lather Shea butter-Also aids cleaning power as CO but with 4-9% unsaponifiables (ingredients which cannot transform into soap), makes it even more skin-friendly. Those unsaponifiables are the fats which soften skin instead of stripping away your natural skin oils while cleansing- kind of lotion like. It is a medium hard oil that creates a smaller more stable lather and can help to create a longer lasting bar Cocoa butter- Working similar to Shea butter, Cocoa butter is a Harder Oil that creates stable lather. The best thing about this butter is that it smells of chocolate and its amazing Olive oil- Very gentle for cleansing and makes a mild and nourishing bar. Great for more sensitive skins or those that suffer with eczema or psoriasis . Gives a good clean feel but creates very little to no lather Castor oil- Needed in very small amounts this thick and sticky oil can turn a soap batter into exactly that. In a nice small amount it can help create a richer and creamier soap. Sunflower oil- A nice lightweight oil high in vitamin e that can help to protect skin and retain moisture. Mildly cleansing with a medium lather I wanted to dive a bit deeper into the relationship between commercial soap making and glycerine but Christmas is nearly here and I have market prep do so it will have to wait for next month
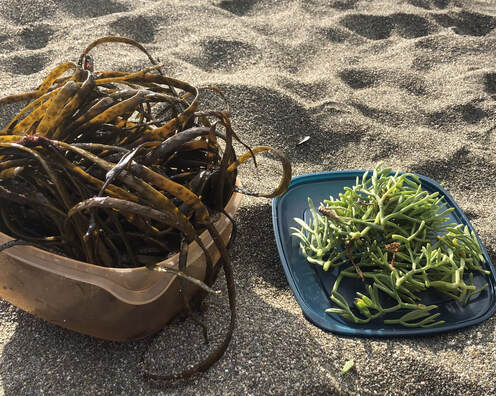
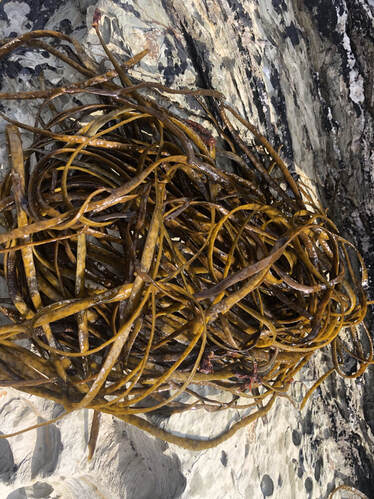
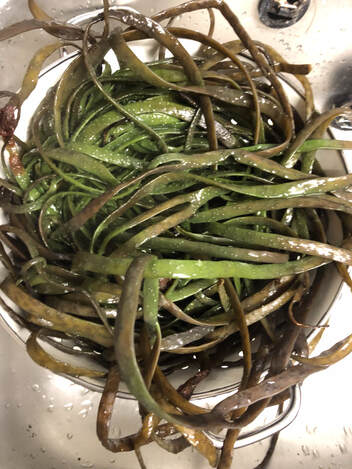
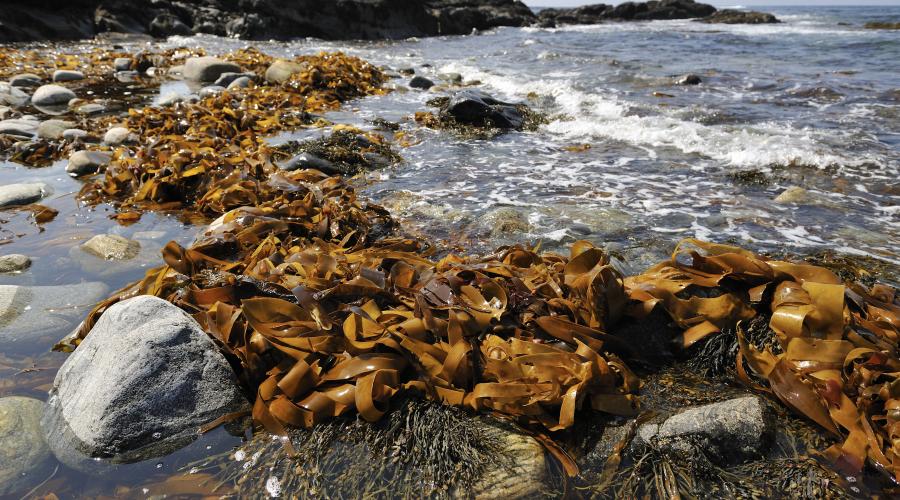
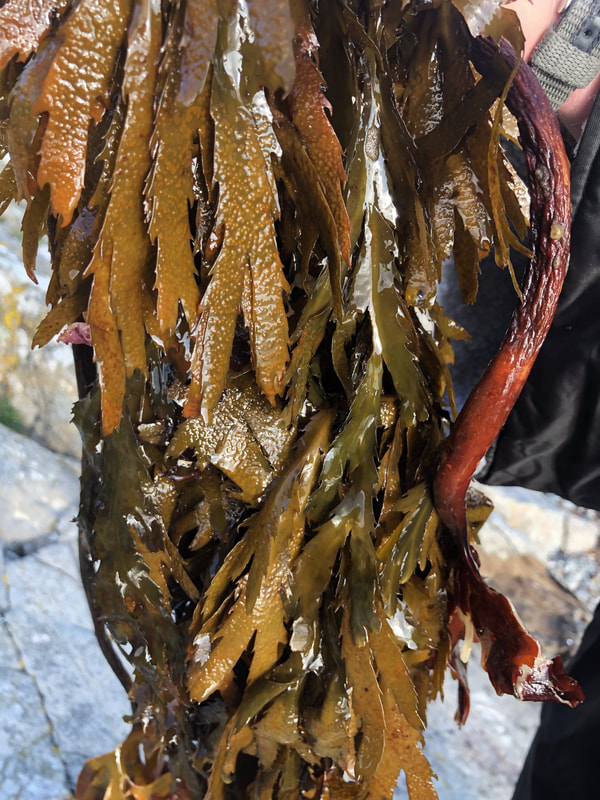
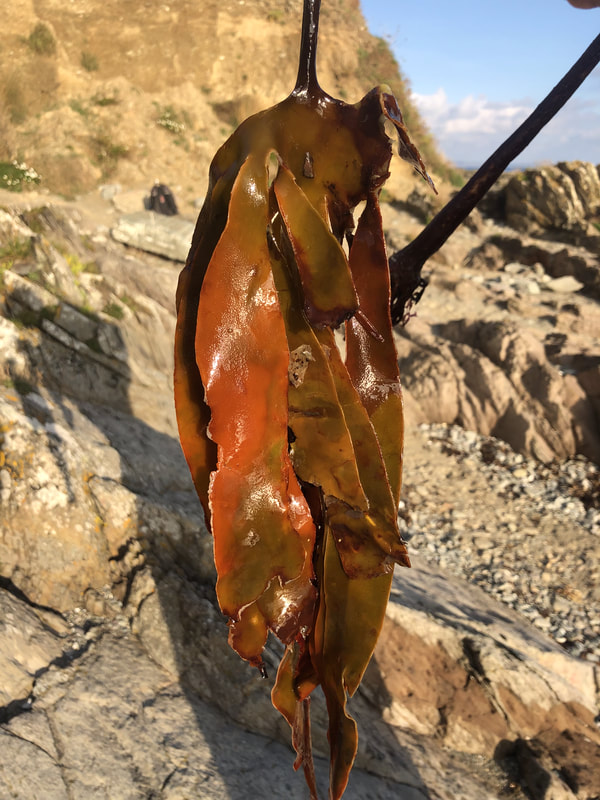
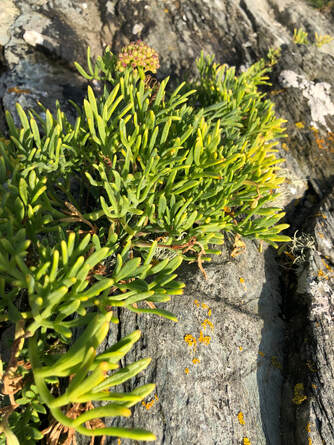
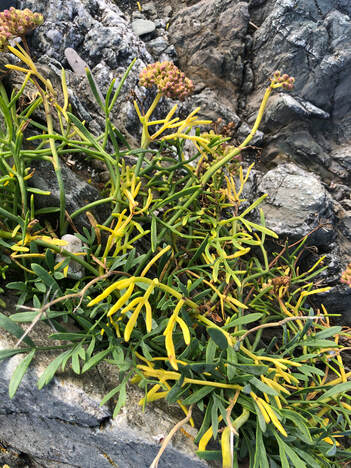
Merry Soapmas me old pals This month I was lucky enough to fit a lovely weekend in away to visit some friends and family in Cornwall and obviously had to make the most of these late autumnal days still warm with sunshine with a trip to the beach. I thought I would also try my hand at foraging seaweed- a completely new area for me but I was keen to see what I could find. I have to say this was without very much research compounded by a fairly late night prior and therefore not surprisingly wielded fairly mixed results. There are quite a few edible species that can be found on British beaches and luckily no poisonous ones so although I am fairly inexperienced in this area I was at least not likely to poison myself. Same rules apply to seaside foraging as are common in the countryside- don't take more than you need, don't strip an area and maybe take a class before with an experienced forager if you want to be sure what your looking for. With a quick glance over a few guardian articles and blogs- the three types I set out looking for are thongweed (aka sea spaghetti), kelp and rock samphire. THONgWEEDApparently when young this grass like seaweed can be used like spaghetti- it is easily dried, stores well and apparently makes a great gluten free alternative. It is rich in calcium, zinc, magnesium, iodine and also contains the vitamins A, E, C, B1, B2, B7 and B9. The internet is full of delicious and creative recipes utilising and praising this seaweed so I was really excited to try and find some. Thongweed is attached to rocks with a kind of sucker and when this is removed the plant can not reproduce so it is important not to remove the whole plant. Apparently not a lot else looks similar so I'm still guessing these long tentacles pictured are indeed Thongweed aka Sea Spagehetti Unfortunately when I got home- the thongweed and its long tentacles started to creep me out and I really couldn't bring myself to cook it and instead had boring old wheat spaghetti for dinner. It did a few interesting things like becoming a beautiful and slightly more appetising shade of green when rinsed with hot water. It also gave off quite a lot of slimey mucus. I'd read in a newsletter from lovely greens that seaweed slimey water can be used to make a lye solution for cold process soaps. I already use a dried organic kelp for my seaweed and sage soap so thought this might be interesting to try instead. When its ready I'll be sure to update here. Unfortunately for me on this occasion Thongweed aka Sea Spaghetti wasn't the one and most of my tub has been put into the compost. I feel good at least the garden will benefit from all those added minerals and vitamins and I also feel good that I didn't make myself eat a bowl of slimy seaweed on this occasion. It did feel like a meal better suited for slugs and snails than tired holidaying megs. However I am excited to see how the soap turns out using the slimey seaweed water and do hope that I'll get to try some delicious recipes utilising thongweed in the future (just perhaps not foraged or cooked by me until further learning has been undertaken on the subject) SEA KelpPerhaps the seaweed I am most familiar with and already use in my favourite soap- Seaweed and Sage. For this soap I use a dried organic powder that is mixed with some oil and added at trace to the soap batter. Kelp has many varieties and most can be used in soap making and spa treatments- for more information in this area I would recommend checking out fellow bristol based beauty biz Seatox who specialise in amazing seaweed spa treatments. I'm not 100 per cent sure that I found any kelp and Im also not 100 per cent sure what I would have done with it anyway. It can be added to soups as well as soaps as an enhancer but I was definetly more after a bag of chips by this point and only collected some for the garden. Rock SamphireAnd last but not least I found something I can eat :) This was growing over lots of rocks and I collected enough for two delicious dinners. Ive actually picked and eaten this before a few years ago on holiday in france and totally forgot how great it is. Seeing how much was spread over the rocks I will be sure to cooking some up again next time I get the chance. I just lightly steamed the rock samphire and had with some other steamed green veggies. It tasted kind of a bit lemoney and a bit salty. Most likely at this time of year the plant would not be at its prime ( you can see a few dried and yellowing stalks) and further research has told me that July and August are the best times of year for this plant.
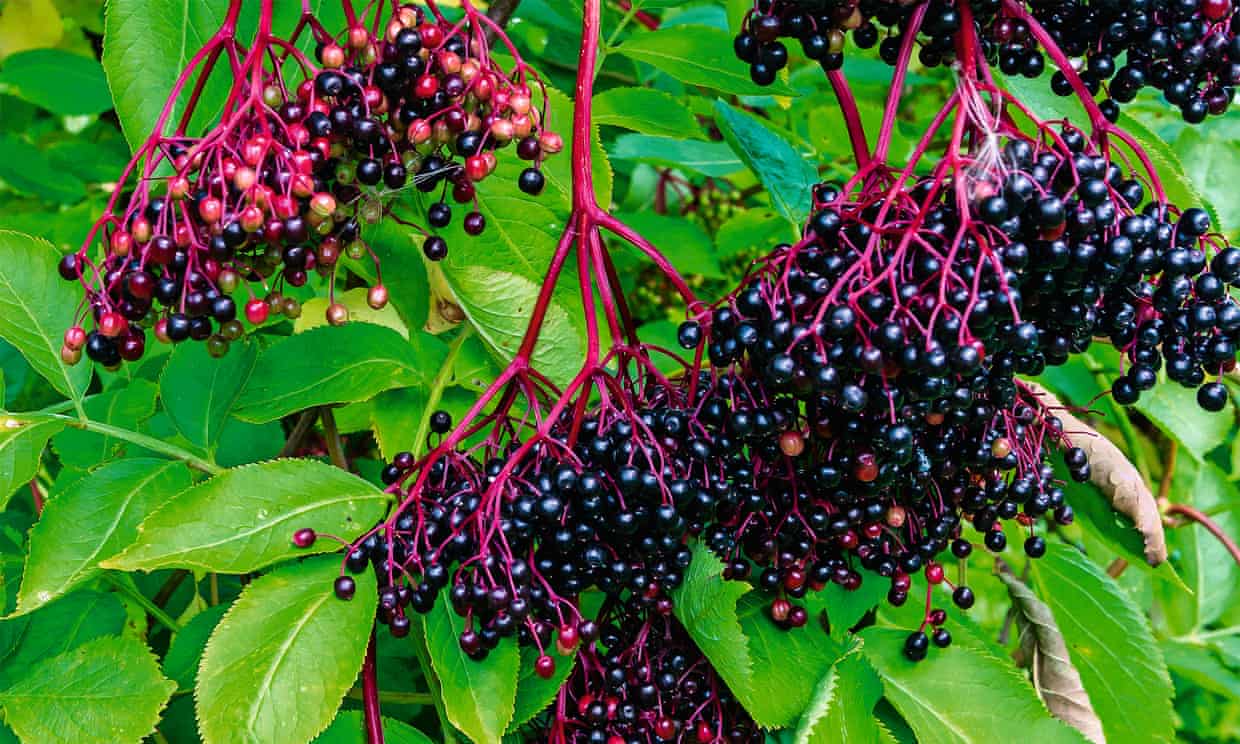
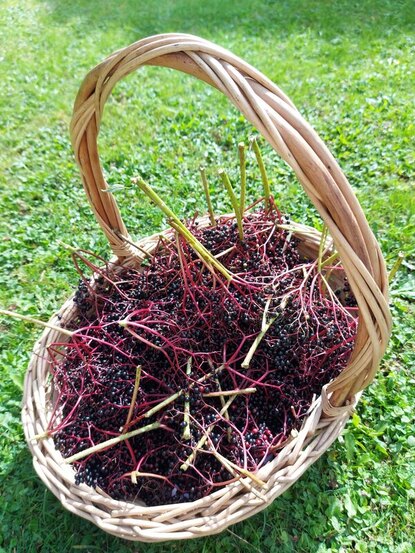
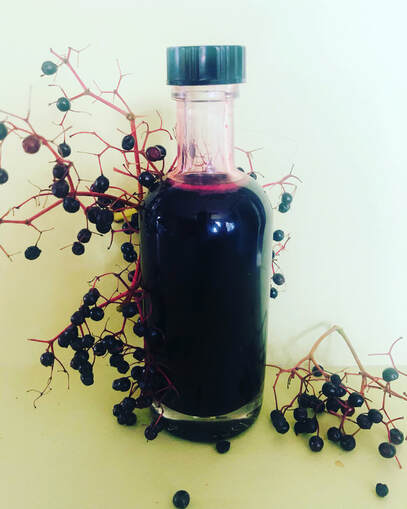
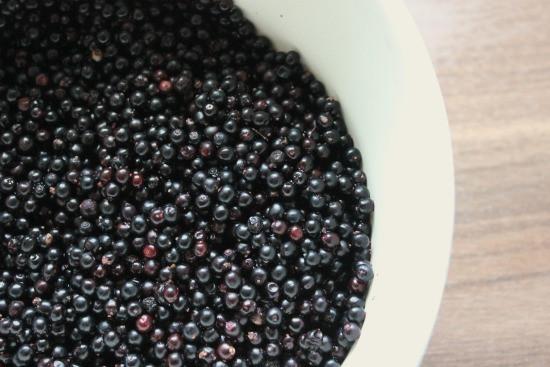
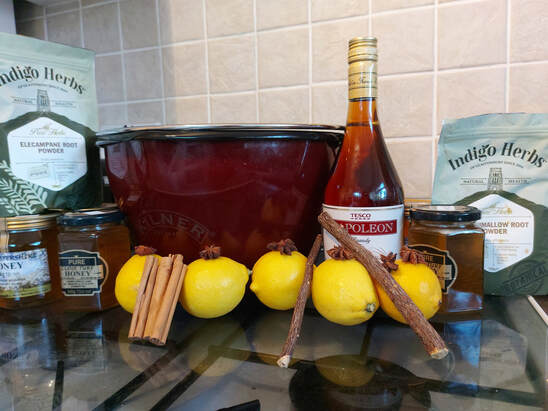
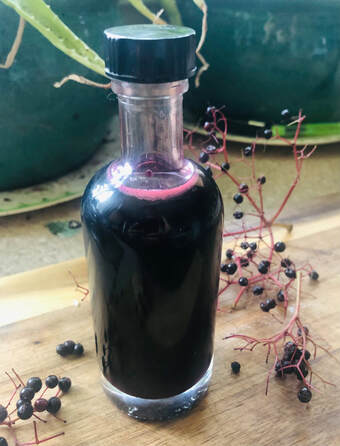
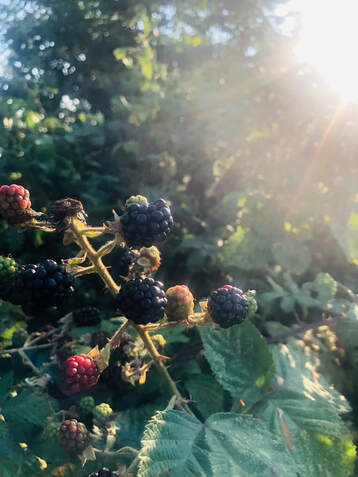
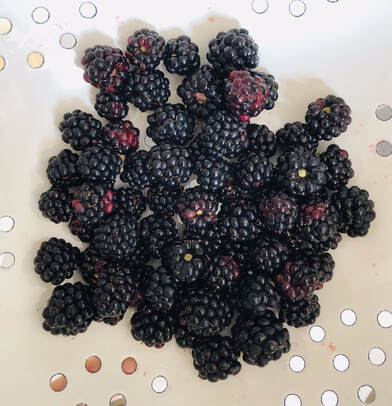
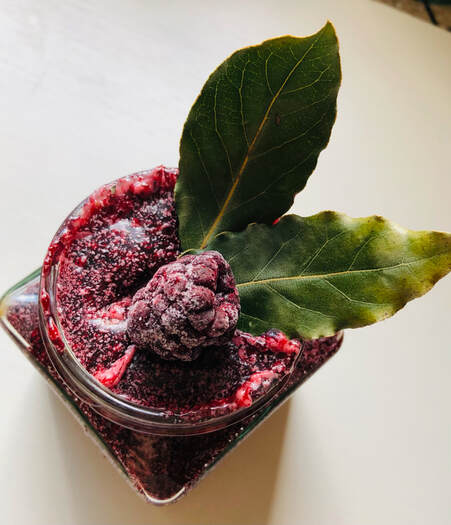
Elderberry refers to several different varieties of the Sambucus tree, which is a flowering plant belonging to the Adoxaceae family. The most common type is Sambucus nigra, also known as the European elderberry or black elder. This tree is native to Europe but is widely grown in many other parts of the world. Elder trees (S.Nigra) can grow up to 9 metres (30 feet) tall. In May/June the trees are full of clusters of small white- or cream-colored flowers known as elderflowers. These can also be used in many recipes that I'm sure I'll explore that here when its the season. The berries are found in small black or blue-black bunches and are just coming to an end around now. Whilst the flowers that come earlier in the year have a delicate aroma and can be eaten raw and cooked- The berries are quite tart and need to be cooked to be eaten. Both the flowers and berries are edible but the leaves and stalks are not and are infact slightly toxic so will likely give you an upset stomach and could cause some nausea. So fo this reason you will need to destalk your berries before brewing. In folk medicine today, the elderberry is considered one of the most healing plants with the dried berries being used to treat influenza, infections, sciatica, headaches, dental pain, heart pain, and nerve pain, as well as a being a laxative and diuretic. The berries and flowers of elderberry are packed with antioxidants and vitamins (particularly high in Vitamin C) that will help to give a boost to your immune system. Especially important as we head into the colder months and the nights become chillier as well as longer- i find this is when we are most likely to pick up colds, flues and general sniffles. The elderberrys are here to keep us healthy as we adjust into the cooler months. Elderberry brandy honey syrupThis year I have only made a very simple elderberry syrup with some added ginger using a fairly basic recipe that you can find here. So I have borrowed this excellent recipe from my good friend Tamsin Sagar who makes some wonderful foraged goodies and has a much deeper herbal medicine knowledge than myself. what you will needAround a litre of destalked Elderberries (picked fresh is always best) 3 litres of water 1 litre of Brandy 1 litre of local honey Juice of 2 lemons Optional added herbs/ spices- you could try Cloves/ Stair anise/ Ginger/ Cinnamon/ Thyme A big pot A muslin cloth or strainer Sterilised bottles what you do Add Elderberries and water together- you want to have ratios of 1 berries to 3 parts water Simmer them for a couple of hours on a low heat Water should reduce to roughly a ratio of 1:2 berries to water Add the lemon juice, honey and brandy to the pot Gently heat so all is mixed/ dissolved and then remove from heat (raw honey shouldn't be heated for long as will lose some of its raw benefits) Leave to stew for at least 24hours but a few days will allow honey and brandy to extract more goodness Strain mixture into sterilised bottles The brandy will preserve the syrup for at least a year so enjoy whenever needed why its goodBrandy whilst acting mainly as a preservative and giving the syrup a good long shelf life (at least a year) it is also a good lung tonic as it opens up the bronchioles getting medicine where its needed. It also helps to relax and ease breathing and the alcohol will extract more and different properties from the magical elderberries. As will the honey that will then help our cells absorb the medicine. Proper raw local honey is its own medicine and has heaps of its own benefits from being anti bacterial, anti fungal and helping with seasonal allergies. If you are getting your honey from a reputable beekeeper or apiary then you are actually helping the bees out here too- as these set ups generally take very good care of their bees and act as safe havens for the bees that are facing so many challenges and threats. There are barely any honeybee hives left in the wild now so bee populations rely on nice beekeepers. Buying local honey helps support them to help the bees and also keeps your food miles down! Win win :) Its August and the hedgerows are full of my foraging favourite Blackberrys, packed full of nutrients and antioxidants these little berries are everywhere and it is worth making the most of them whilst they are. And with the cooler August we're having- you still have a good few weeks to get outside and start picking. Blackberries come into season alongside many other fruity joys- apples, elderberries, plums and figs also all come into fruit in the next few weeks. So its a great time to pick up free seasonal fruits, always remembering to try and pick away from roads (especially busy ones) and higher than the area dogs may have peed- i would also recommend wearing long sleeves and trousers as brambles and nettles are good neighbours in the fruity hedgerow. Blackberries are high in antioxidants which help control free radicals (one of the leading causes of skin damage). They are also high in vitamins A<B< C and E along with a host of key minerals (potassium, magnesium, calcium) and these vitamins and minerals which can help to boost collagen production (the protein that is responsible for skin elasticity) so Blackberries are sure to help maintain healthy vibrant glowing skin. Now of course you can do this by eating them and I do ALOT. Every year- with the seasons I have a few classic recipes that I like to make so I can preserve some of my foraged favourite dishes for later in the year. Blackberries are no exception and I tend to fill the freezer with enough to last many months as well making jams, cordials and deserts. But this year I have also decided to have a go with a few blackberry beauty recipes starting with this one shown below. Blackberry AND BAY scrubWhat you will need1/2 cup blackberries (washed) 1/3 cup coconut oil 3 cups of sugar (read below for sugar choosing tips) 2 dried bay leaves A small sprig of rosemary (optional) A tsp vitamin e (optional) A blender or mixer A sterilised jar what you do TO MAKE Wash the blackberries Chuck it all in the blender Whip up Check consistency- too grainy (add more oil), not abrasive enough (more sugar) Store and label in your sterilised jar/ container Will keep in fridge for up to 4 weeks or 1 week at room temp TO USE Apply a generous layer to body in shower or to face at sink Massage over skin gently Rinse off with warm water Pat dry- no need to moisturise after :) why its goodApart from the benefits listed above of the mighty blackberry- its probably worth mentioning some of the other choice ingredients. As one of the best parts of DIY beauty is you can then tailor your own scrub to suit your own needs.
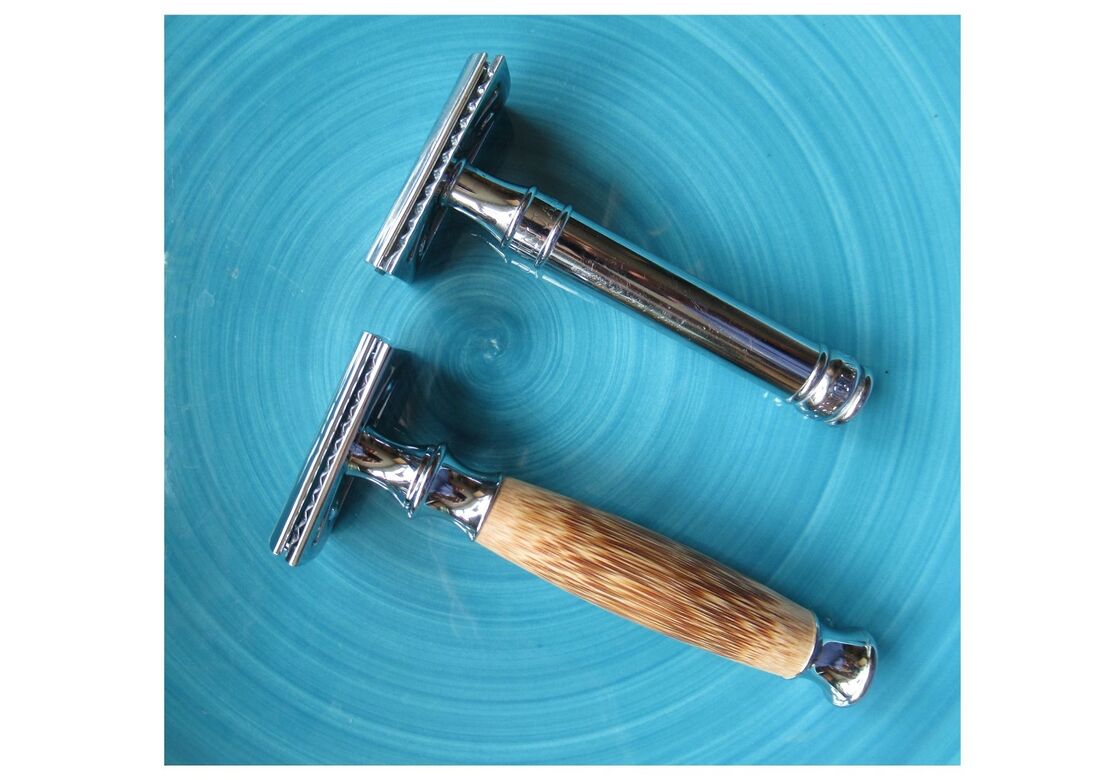
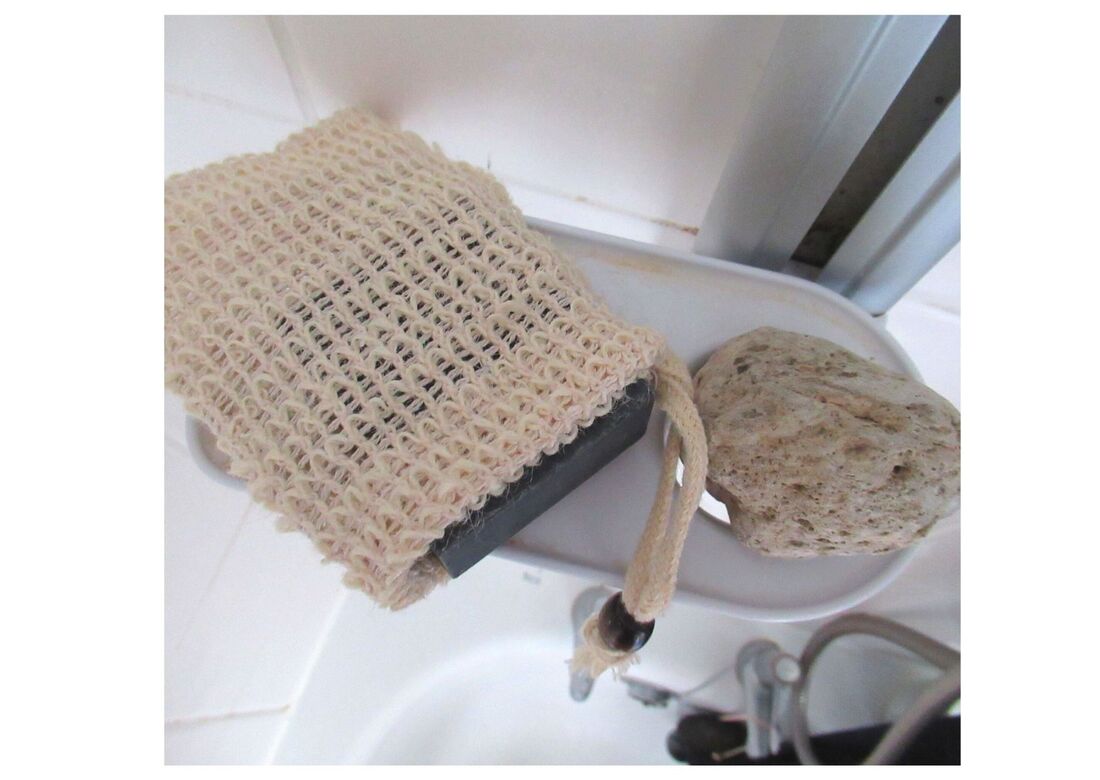
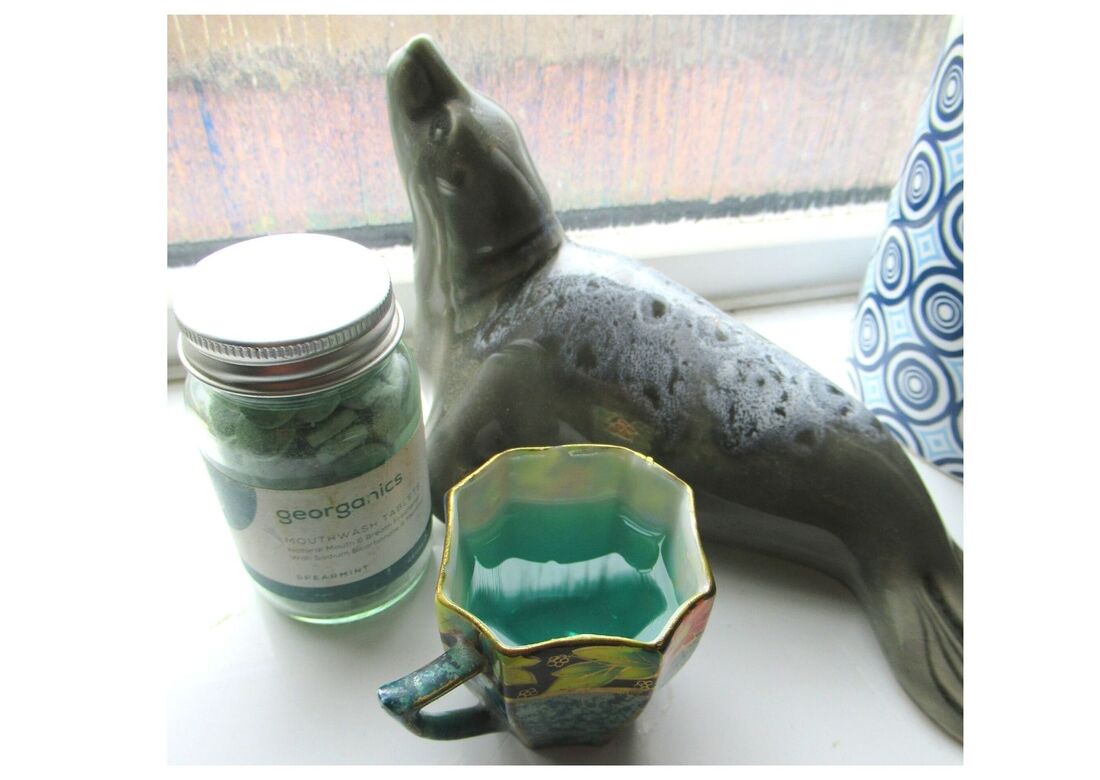
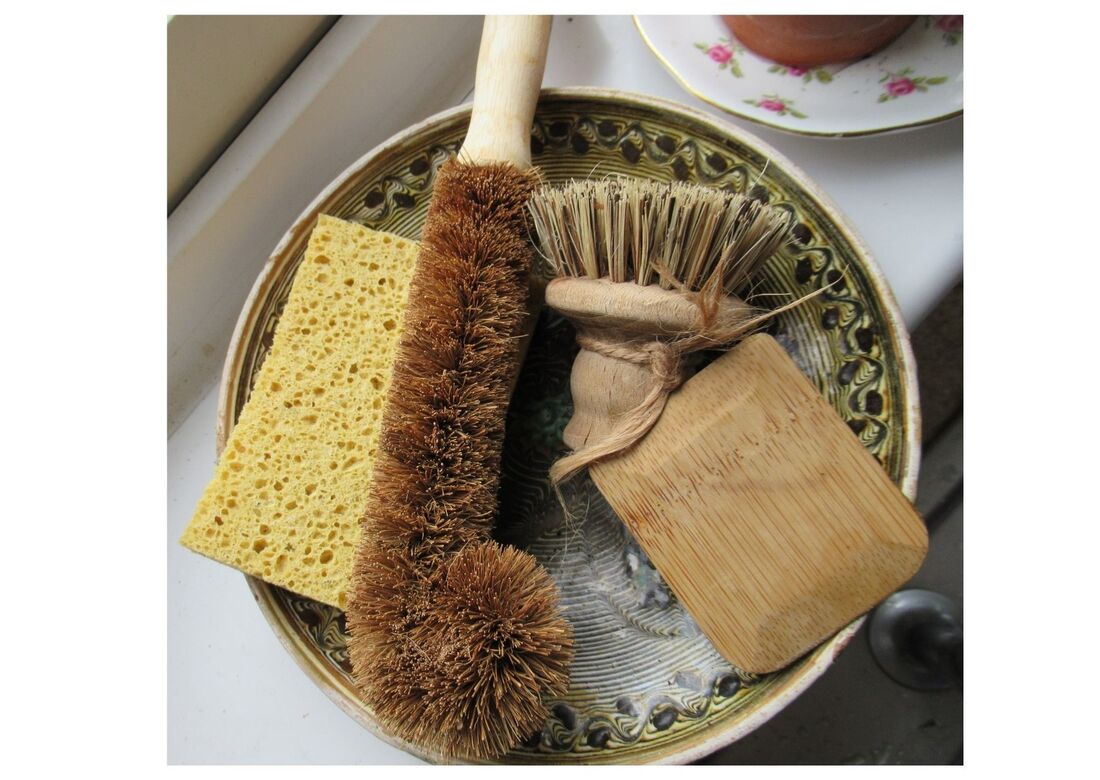
Coconut oil- keeps skin hydrated by trapping moisture and bolster the skins protective barrier. Also has anti-inflammatory properties so can soothe irritated skin, anti-bacterial properties to keep skin clean and prevent break outs as well as contributing toward increased collagen production. And lastly CO has a high fatty acid content so works well as a moisturiser. You can swap coconut oil out for other skin loving oils and Ive seen alot of recipes using honey as well. I personally love CO and as one of my main soaping oils and fridge staples i tend to always have a lot on hand so it works well for me. Sugar- In this recipe I have used a soft light brown sugar (partly as this was the first to hand) but there are some slight differences in sugars. White sugar is coarser and you will get a harder scrub using it- this may be more desirable if you want to make a body scrub. Brown sugar is finer so maybe better suited for a facial scrub- again have this in mind because brown sugars can vary alot but get a softer sugar if you want a softer scrub. Sugar itself is a natural exfoliator that can help get rid of dead skin cells to leave skin smoother and both types of sugar contain glycolic acid, an agent that helps skin cells regenerate faster for a more youthful appearance and loosens the bonds of dead skills making them easier to scrub away. It is also possible if you want a rougher scrub for the body to use salt- Salt can have a drying effect on the skin, while sugar is a natural humectant, meaning that it pulls moisture from the air and into your skin. So this again is up to you and what you want the scrub for- although salt is not generally recommended for facial scrubs. I wanted to make something suitable for my face so a softer brown sugar worked well for me. Bay- anti-inflammatory, helps to retain moisture and reduce puffiness- has also been used in acne treatments. Rosemary- helps to soothe skin, reduce redness, swelling and puffiness of the skin . Useful in the treatments of conditions of eczema, psoriasis and dermatitis. An antioxidant that will prevent damage from free radicals Vitamin E- Nourishing whilst it also protects skin from damage from UV and free radicals. Anti-inflammatory so can soothe skin and hydrate it whilst providing protective barrier. Also an anti-oxidant it can prolong shelf life by preventing the oxidisation of oils. And lastly scrubs are good because they make our skin all nice and smooth- removing and cleaning away all the dead cells and leaving nice fresh skin behind, skin which can soak up moisture and goodness better. Great for the body before a shave they can help pull the hairs up so preventing and getting rid of ingrown hairs. Helps circulation and heathy skin regeneration! This scrub is fairly gentle and I hope I've added enough info on tips that you can tailor it to your own needs. Honestly it takes maybe 10mins to make and you can always swap herbs and oils around to your skin needs or to what you have available. Also half or quarter the recipe if you only want to make a small batch to try out or double if you want to make some for friends. Enjoy and have a berry merry time xx As plastic free July comes to an end I thought I'd share a few of my favourite plastic free swaps. These are swaps and changes I've made in my own journey to live a more sustainable zero waste and yes plastic free life. Its not easy to change everything and it takes time to use stuff up and replace with more environmentally conscious products and plastic free July aims to help draw attention and raise awareness of some of the simple swaps we can all make it to help save the planet and resolve the plastic pollution crisis. There is heaps of info out there on alternatives to a lot of the essentials we all need that often come in single use plastic so I'm going to keep it short and sweet and have whittled it down to 4 things I love and would recommend as I believe them to be so much better than their plastic counterparts. If you haven't already I would recommend swapping these things in next time To mark the end of plastic free July and that I've finally started a blog I'm also offering a 20% discount with code PFJuly for the next week and a free soap saver bag for all orders over £20- so theres never been a better time to make some sustainable swaps 1. SAfety razorThe essential in plastic free shaving- the safety razor not only looks cool and kind of old fashioned but is a truly great swap. It gives a super clean shave and the only waste with these razors is the metal blade. I bought a metal safety razor about 4 years ago that I like but I now stock safety razors with wooden handles (which I think are actually much nicer). Once you've invested in your safety razor- it will last you a lifetime with some care. And added bonus the blades are super cheap so will save you lots in the long term. The blades generally come in a small amount of cardboard and paper that can recycled and the metal blades should be disposed of in a sharps bin when they've become blunt and no good. You do need to take a little care with these razors as they are sharp but the amount of shaving waste you will save is worth that extra bit of care and they look cool. 2. sisal soap saver bag (and Soap)The soap saver and soap are a game changer in my showering routine and I love them. It is basically a small pouch that you pop your soap in and hang in the shower like one of those pesky plastic bottles with the hooks. The pouch and soap become a self soaping exfoliating little pouch so not only can go do away with single use shower gel bottles but also with those silly body puff things. Its a great body exfoliator so you can give yourself a good scrub and get that skin all lovely and soft. As the drawstring on the pouch allows you to hang the soap it can dry out ensuring your soap lasts a long time by not sitting in a little puddle of water and becoming soapy mush. They are also made from completely natural fibre Sisal so when they do eventually need replacing you can home compost them. Just an FYI soap and especially handmade natural soaps contain glycerine that will attract water- you need to let your soap dry between uses to extend its life so you can get the most amount of use from it. If your not sold on soap bags then a decent soap rack that allows air to get underneath the bar will help prolong its life and keep your bar hard and useful for a longer time. The other great thing about these bags is you can stuff all the little ends of soap bars in them and at a teeny £3 I would definitely recommend trying one out. 3. mouthwash tabs (from georganics)I'm a big fan of Georganics and stock a good range of their natural Toothpastes and powders as well as the mouthwash tabs. You can find all of these in the Dental section of my shop. I love the mouthwash tabs because they are just so much nicer and more refreshing than the harsh big brands. I have a little cup that I pop a tab in so when I'm brushing, it fizzes away already for me to swish my mouth out with at the end. I have quite sensitive teeth and also suffer with bruxism so am protective of my teeth but have found using the mouthwash tabs to help keep me smiling. I know from chatting to lots of people at markets that toothpaste tastes and requirements vary greatly but if you are interested in trying out a natural toothpaste then Georganics are the experts in this area. Personally I prefer the Toothpowders (particularly the charcoal) and find it be slightly more abrasive and fizzy to give a deep clean which is great for my tastes. 4. Kitchen- Compostable sponges and brushesThis one is a bit of a no brainer- plastic sponges or compostable sponges? Well guess I'm just here to say that compostable sponges are great and work every bit as good as the ones you generally find in the supermarket. Compostable sponges can be made from a range of natural materials from wood pulp to sisal and coconut husks- and I would get a range so you can combat all your dirty dishes. The sponges are great but for things that need a bit more a scrub I have a wood sisal pot brush and a bamboo scaper. I was a bit skeptical that the bamboo scraper would work but its actually amazing and gets everything off with very little effort- washing up Joy :) Seal doesn't stock much kitchen stuff apart from Bamboo Straws but my market mate who runs eco earth market has a great range on his site alongside heaps of other sustainable home essentials. Check it out- ecoearthmarket.com/collections/kitchen and swap those horrible plastic sponges out for some much nicer natural alternatives. So thats it- my 4 of my favourite swaps and recommendations. There are heaps of other swaps to make from reusable cups and cutlery, shopping bags, solid shampoos or switching to loose tea and shopping locally at farmers markets and your local refill store. Really the list never ends as more and options come on the market and more companies adapt to keep up with consumer demand for sustainability. I guess its just remembering to try and do what we can and make better choices when we can. By making that extra effort to choose products that are kinder to the planet and that you can take pride in owning- it will make a huge difference in time. Together we can make change happen and get rid of single use plastics
Peace and Love Meg x |
MEGSoap maker and DIY enthusiast- sharing some easy home makes. Archives
September 2022
|










 RSS Feed
